For Japanese style recipes and food info go to

http://japanesecomfortfood.blogspot.com

Thursday, December 10, 2009

Gnocchi di Pane (with help from Lidia Bastianich)

Photobucket

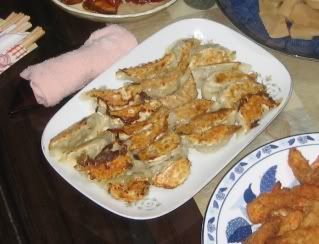
During my trip to northern Italy last fall, I was introduced to a pasta from the area around Mantova called Caponsei. It's a very soft, delicate fresh pasta similar to Gnocchi, but made with bread crumbs instead of potato. I have searched for a recipe for over a year, but have not been able to come up with anything close to those we got at the little pasta shop in downtown Peschiera del Garda. Just before Thanksgiving, Sirius satelite radio's Martha Stewart channel conducted their annual helpline with celebrity chef's available to answer questions from the audience. I noticed on the schedule that Lidia Bastianich would be on, and considering her pasta prowess and northern Italian heritage I thought she might be the person to help me out. I called in and described Caponsei to her and although she did not know this particular pasta (the name might be a local dialect), she did suggest to me the following recipe for bread gnocchi. I tried it out, and while probably not authentic Caponsei, it is very similar and tasty. Thanks Lidia for the "off the top of your head" recipe, and I hope you won't mind me sharing it here. I certainly give you full credit.

As for people reading this, if you have never made fresh pasta before and are a little intimidated by the thought of it, this is just about the easiest fresh pasta on earth. It requires no special tools, there is very little flour in it so you don't have to worry about kneading it to get the gluten just right, and the only skill required to form the gnocchi are the same ones you used in kindergarten to make things out of Play-Doh.

Ingredients:

2 cups fresh bread crumbs (see below)
1/4 cup milk
1/3 cup flour
1/2 cup grated Parmigiano Reggiano
1 handful fresh chopped parsley
salt, pepper, fresh nutmeg to taste
1 large egg


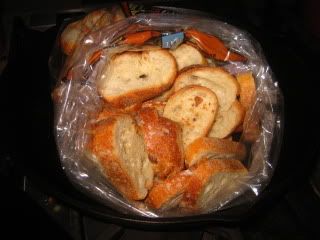
To start, make fresh bread crumbs by taking some good quality, day old bread (in this case I had left over baguette slices from our holiday party).

Photobucket

Trim the crusts and put aside for croutons, bread crumbs or bird feeding

Photobucket
Cut the bread into 1/4 inch cubes

Photobucket

Pulse briefly in a food processor until they are a relatively uniform crumb

Photobucket

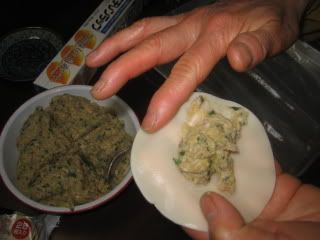
Add milk, cheese, parsley and spices to taste (it should be aggressively flavored)

Photobucket

Add one beaten egg and toss lightly with a fork until just barely incorporated

Photobucket

Take one teaspoon of the mixture and drop onto a floured board; roll lightly to coat with flour

Photobucket

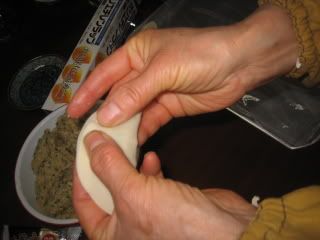
Lighty roll between the palms of your hand, meatball style

Photobucket

Being careful not to compact too much, form a small ball about the size of a cherry tomato

Photobucket

Next, roll the ball back and forth across your palm with the tips of your fingers to form a small football shaped pasta

Photobucket

The finished pasta should look like this

Photobucket

Roll lightly in flour to coat and prevent the pasta from sticking to each other

Photobucket

When ready to cook, bring a large pot of salted water to a boil, add the pasta and cook until they just begin to float
Photobucket

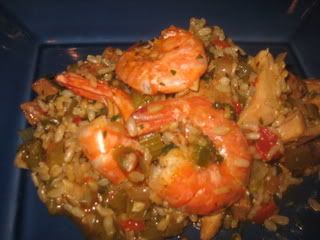
Remove with a spider and sauce in your preferred manner. Traditional sauces include melted butter with sage, simple tomato sauce or in this case a gorgonzola cream sauce.

Saturday, May 9, 2009

Carciofi al Cartoccio

(Artichokes Grilled in Foil)


Chiko and I just celebrated 10 years of marital bliss with a 10 day trip to Italy! As usual, we went to the apartment, which we rent in the lakeside town of Peschiera del Garda near Verona. Being the first week of May, the farmers' markets were teaming with great produce including white asparagus and beautiful artichokes.


Thanks to my cousin, the intrepid Dan Diego de La Jolla, the apartment has recently been upgraded with this beautiful Weber kettle grill.


This highly prized piece of American cooking technology is nearly impossible to find in Europe, so it was smuggled in by the infamous Winters clan, through a complex system of blind drops and ratlines and involved stops in several former soviet republics. Now that it is safely on the shores of beautiful Lago di Garda, we put it to work grilling copious amounts of vegetables and fish.


One of the highlights was the Carciofi al Cartoccio. Honestly, I thought this up on my own, but in subsequent research found that other people have been using this method as well.


In southern Italy, it is a popular practice to throw whole artichokes directly on the embers of a wood fire and cook them until the tough outer leaves are completely burned. They are then removed from the fire and peeled, revealing the artichoke hearts which have been steamed in their own juices and imparted with a smokey flavor. Personally, I'm not quite brave enough to try this recipe for fear of burning the delicate stems, which for me are the best part. Thinking back to my boy scout days when we baked potatoes in foil in the ashes of our campfire, I decided to wrap the artichokes in foil to give them a little protection from the fire.


I started out with a handful of lovely artichokes, fresh from the market with their beautiful long stems in tact. Next I prepared a large non-reactive bowl filled with copiously acidulated water (for those who don't speak Batali that means there was a bunch of lemon juice in it to stop the artichokes from turning brown).


I pulled off the tough outer leaves.


Trimmed the base.


Peeled the stem.


Cut the top off.


Removed the choke.


Got the last of those little hairy buggers with a teaspoon and placed it in the lemon water while I proceeded with the rtest of the artichokes.


Seasoned with olive oil, salt and pepper.


Wrapped tightly in foil.


Placed them around the perimeter of the coals in the bottom of the grill and replaced the cooking grate.


I proceeded to cook the rest of the dinner. For the Primi, we went to the fresh pasta shop in Peschiera and got Caponsei, a sort of gnocchi made with bread crumbs instead of potato. It is a very particular dish from the nearby region of Mantova. They are light as air and I would love to make them at home, but so far I have only found recipes for this pasta written in Italian. One of these days I will have to translate one into English and feature it in another post. For the Secondi, I grilled a combination of calamari, local lake trout and sea bass from the nearby Adriatic, occasionally lifting the grate and turning the foil wrapped artichokes. When the fish were ready, I removed the artichokes from the coals, unwrapped them and dressed with more olive oil and a squeeze of lemon juice. The total cooking time for the artichokes was about 45 minutes, on a medium grill (temperature at the lid was about 350-400.


P.S. Last night I made the artichokes again, but this time on my gas grill. I placed the foil pouches on the cooking grate over direct heat. They cooked much quicker this way (maybe 20 minutes total time). You have to turn them more frequently to keep them from burning, but they still came out delicious.

Friday, April 17, 2009

Kuniko's Gyoza


Just got back from Japan, and I was lucky enough to spend some time with the family that I lived with as an exchange student over 20 years ago. My Japanese mom is named Kuniko, and she is a fabulous cook. In fact, after being a stay at home mom and raising her four children (plus me for one of those years), she took a job in the kitchen at their local hospital. For as long as I can remember, she has been famous throughout the neighborhood for her Gyoza (Japanese potsticker dumplings). While I have watched her make them in the past, and even helped her stuff the dumplings, this time around I took the opportunity to write down the recipe and photograph the process.
Ingredients for Gyoza Filling (makes about 28 gyoza):
1/2 lb ground pork (you could substitute chicken or turkey)
3/4 pound seasonal cabbage (green cabbage in winter or Napa cabbage in spring/summer)
1/4 bunch chives
1 Tbsp ground fresh ginger
1 garlic clove finely minced
1 Tbsp sake
1 Tbsp soy sauce
1 tsp sesame oil

Chop the cabbage finely, and sprinkle with salt. Wait 10 minutes, then wrap the salted cabbage in a clean dish towel and squeeze out the excess moisture. This will prevent the filling from being to wet and making the dumplings fall apart. Mix all the ingredients well, then take a tablespoon of the filling and fry it quickly. Taste for seasoning and add salt and pepper if necessary.

Get a package of Gyoza wrappers at your local asian market.

Place a wrapper in the palm of your hand and place a teaspoon of filling in the center.


Wet your finger and run a thin line of water around the perimeter of the wrapper.


Fold the wrapper over and press to seal the edges.


Pleat the outer edge and pinch to make a decorative edge.


After all the gyoza are made, heat a non stick pan over medium-high heat and add a small amount of oil to coat the bottom. Place a single layer of gyoza in the pan and fry for several minutes until golden brown. Do not stir or shake the pan during this time. You want the one side to carmelize and stick to the pan (thus the name pot stickers).

When you can see the bottom edge turning golden, pour in a half cup of water, reduce the heat to medium and cover loosely. Cook for several minutes until the water is evaporated and the gyoza wrapper turns translucent.


Shake the pan to loosen the dumpling and invert onto a serving platter. Serve with a dipping sauce of ponzu (Japanese citrus flavored soy sauce), red chile flakes and sesame oil.

Wednesday, February 25, 2009

Fat Tuesday


Chiko and I met in New Orleans, so that town has always had a special place in my heart. Before Katrina, I went there frequently for conventions, but so far I have not had the chance to go back since the hurricane. Hopefully I'll get there soon because it was always one of my favorite places to eat and party. I'm off to Vegas to attend the American Academy of Orthopedic Surgeons convention today, so last night I wanted to do something special for Chiko in honor of Mardi Gras and the fact that she actually had a day off.

I've eaten jambalaya many times, but never actually made it myself, so I went on line, found a recipe on neworleanscuisine.blogspot.com and headed to the store to buy the ingredients. On my way home, I was listening to Sandy Gluck, host of Everyday Food on Martha Stewart's Sirius Radio station, and she described Jambalaya as a sort of Cajun Paella, and after looking at the steps of the recipe I think is the perfect analogy. FYI the recipe calls for a good amount of cayenne pepper in the seasoning mix and the final product was pretty damn spicy. I happen to like it that way, but if you are not a fan of really spicy food, you may want to cut back on the cayenne a little. You can always add more when you taste the broth and adjust the seasonings. The full recipe is up on the above neworleanscuisine link, so I won't repeat the details but here are the pics.


The recipe recommends a cast iron dutch oven, but I have this beautiful hand hammered, solid copper covered roaster that I brought back from Montepulciano in Tuscany and I used it because, in addition to excellent heat control, it makes a nice presentation at the table.


You start with the cajun trinity: onions, celery and green bell pepper, plus andouille sausage and chopped tomatoes.


Saute the trinity along with the andouille till the veggies are soft and the sausage has rendered its fat a little.


Add the tomatoes, cook briefly then throw in the rice and saute it for several minutes. The recipe calls for long grain white rice but I substituted Japanese brown rice because I have a 20 lb bag of it in the closet and I needed to "use it up" as Sandy would say.


Next add the stock, seasonings and chicken meat and bake in the oven for 25 minutes. The recipe says to do it uncovered, but I was worried about the longer cooking time of the brown rice so I covered it.


Take it out, add the shrimp, green onions and chopped parsley and back in the oven. Again, because I used brown rice I had to modify the recipe slightly. The recipe says 10 more minutes, but mine took about another 25 minutes covered for the rice to get tender. I was worried that the shrimp would overcook, but I instead of peeling them I left the shells on and they were perfect.


For dessert I opted for an old school classic, crepes suzette. Very simple, tasty and elegant. I've been making a lot of crepes lately, so I didn't bother with a recipe. Just a 1-1-1 ratio of flour, milk and eggs. In this case it was:

1 cup flour (I used my smuggled double zero Italian flour)

1 cup milk (didn't have any of the cow variety so I used almond milk)

1 egg

Whipped that up till it was smooth, seasoned with the zest of a tangerine, two teaspoons of sugar, a pinch of salt and a dash of triple sec. I let this rest while we ate the main course, a very important step to getting tender crepes.


I cooked a bunch of crepes, then folded them in half then half again to form a little triangle. In my biggest saute pan I melted some butter, added the juice of a tangerine and a little sugar and reduced it to a syrup. I placed all the folded crepes in the syrup, drizzled the whole thing with triple sec and flambeed it. Sounds like a lot, but I swear it was so simple and took less than 10 minutes.


E voila!


I have to say that the Italian double zero flour is amazing. I brought back a couple of bags when I went to Verona last fall and it makes the most amazing pasta and crepes. It is soft as talcum powder and makes a very tender dough or batter. If you ever see it online or in the store BUY IT!