For Japanese style recipes and food info go to

http://japanesecomfortfood.blogspot.com

Thursday, December 25, 2008

Feast of the Seven Fishes

Well, to be truly accurate it was four fishes, one cephalopod, a crustacean and a mollusk..... but let's not pick nits.


Although my ethnicity involves more cross breeding than your average shelter dog, the 25% Italian component has always dominated our family identity and traditions. It just wouldn't be Christmas Eve in our family without a major seafood feast. Normally, this would be held at my father's house in New Jersey, but this year Chiko and I are hosting the holidays.


Being married to the hardest working and prettiest fishmonger in the world means that I have access to an incredible bounty of maritime ingredients. While I did not have time to document every step of each dish, I will run down the menu and if any readers want to post a request for the recipes I'll follow up in a later post.


For starters, my dad made a seafood timbale of flounder and salmon filled with scallops cooked in Pernod.


Next came baby octopus which I barbecued briefly and then marinated overnight in olive oil, lemon juice and garlic.


Portuguese style cod poached in olive oil.


Tuna and salmon sashimi by chef Chiko!


And last but not least Gambas al Ajillo (Spanish style shrimp in garlic, olive oil and smoked paprika). Wash that all down with a couple bottles of Pinot Grigio and it was no wonder I woke up face down in front of the roaring fireplace with the dogs snuggled up against me!

Monday, December 8, 2008

Quaducken


Spent another weekend with our friends Mark and Sylvia in Peschiera, and we were going to be hosting dinner for some other friends so I needed to come up with something that would blow their minds. I've been thinking for awhile about trying a Turducken, which is a Cajun dish involving a chicken stuffed into a duck which is then stuffed into a turkey. (For a good description and photos of this dish check out http://en.wikipedia.org/wiki/Turducken).

Jumped in the car and headed down to our friendly butcher Piero (see my previous post http://jonfromconnecticut.blogspot.com/2008/11/il-maestro-di-maiale.html). I have always known Turducken as a Cajun dish, but Piero told us that in the nearby town of Mantova, there was a medieval dish of multiple birds stuffed one inside of another and roasted. They would start with a tiny bird like a sparrow and do as many as twenty progressively larger birds, culminating in a swan!

He didn't have any turkeys or swans, so we went with a quail, a chicken and a duck and dubbed it "quaducken". Piero deboned the birds by removing the spine, opening it up like a book by cracking the sternum and pulling out the ribs, wings and leg bones. We ended up with three totally deboned birds ready for stuffing. I layed the duck on my board, skin side down and seasoned it with salt, pepper, rosemary sage and olive oil.


Next I layed the chicken on top of it. To try to keep the thickness of the overall roll even, I reversed the orientation of the birds so that the chicken's tail side was aligned with the ducks neck.


Repeated the same seasonings and then layered the quail on top and seasoned it as well.


Next I took some fresh pork sausage and spread it on the quail.


I rolled the roast and tied it, then placed it on the rotisserie spit and we cooked over medium coals (325 degrees) for an hour and half and took it off when it registered 16o in the center.


Took it off and rested it then sliced cross wise and served.


Spectacular!

Sunday, November 2, 2008

IL MAESTRO DI MAIALE


Unfortunately, in America the butcher is, for the most part, a thing of the past, gone the way of milkmen and the friendly neighborhood beat cop. While supermarket meat counters with their cellophane wrapped beef and pork delivered from a processing plant hundreds of miles away exist in Italy too, I was delighted to observe numerous traditional butchers in every town I visited on my most recent trip.

In Peschiera del Garda, our unofficial home base, our friend Mark prefers Macceleria da Piero, and so that is now my regular spot for buying meat. Piero and his wife run this establishment which is roughly the size of my kitchen at home. The meat is for the most part kept in it's primal cut form and then butchered to order. He grinds his own beef and pork for meatballs, sausage, etc. In addition to beef, lamb and pork, Piero stocks in chicken, rabbit, and guinea fowl, as well as a nice selection of salumi.

Pork Arista (bone in loin roasted with garlic and rosemary) is a traditional dish throughout Tuscany and the rest of northern Italy. According to legend, during a visit to Florence by Greek bishops in 1430, they were served pork loin roasted with garlic and rosemary, and it was so delicious that the Greeks proclaimed it "arista" (good in Greek). The name stuck. The traditional technique involves stabbing the roast all over with a long thin knife and filling the holes with garlic and herbs. I remember my grandmother making a dish like this for Sunday dinner when I was a kid.

In mid October, I visited Peschiera with my cousins, and our friend Mark invited us to his home to enjoy Piero's variation on traditional Arista. We joined Mark on his trip to Piero's shop and got to witness "il maestro" at work. We started by asking for a roast, and Piero asked how many people we had. He then went into his walk in and emerged with an entire pork loin primal (basically half a pig, minus the head and legs).


He chose a nice section of loin (about 9 ribs worth), and carved it out, cutting through the spine with a band saw. Piero began by "Frenching" the rib bones (scraping the meat down from the end of the ribs towards the body of the roast).


Instead of stabbing the roast and "studding" it with herbs and spices, he took his knife and ran it along the ribs down towards the chine bone as if he was going to make it into a boneless roast. Just before he separated the ribs from the loin, he turned his knife parallel to the board and began cutting into the loin meat while slowly rolling it away from the ribs.


By doing this, he created a large rectangular piece of pork loin with the ribs still attached at one end.


He pounded the meat with a mallet, then seasoned it with salt, pepper, garlic powder and fennel seeds.


He then layered it with pancetta before rolling it back up like a jelly roll and tying it with string back to the ribs.


A few sprigs of fresh rosemary and some more pancetta on the outside, then thrown in the oven at 375 for about 2 and a half to 3 hours, and this is Piero's version of my grandma's Sunday roast pork. Mark and I are cut from the same piece of cloth (or is it pig?) and so he could not leave well enough alone and feels obligated to "guild the lilly".


Because the ribs are the best part, he asked Piero to take a slab of pork ribs and tie it to the other side of the roast. We then took this back to Mark's house and cooked it on a charcoal rotisserie with some hardwood chunks thrown in for a little natural smoke flavor.


Three hours later, the meat was ready.


Often times, pork loin is so lean that it has a tendency to dry out, but with the pancetta rolled inside it stayed moist and tender, the herbs and spices perfuming it perfectly. I tried this dish at home last Sunday, with the only difference being that I roasted it in the oven instead of barbecuing it. It was very good, but I can definitely say that the wood smoke and the charcoal added significantly to the flavor and I would recommend doing it that way if at all possible.

One final observation on the experience of a visit to the butcher. This roast was prepared to order in a little mom and pop shop, Piero cutting the meat and his wife at the cash register. Occasionally she went behind the counter and handed him spices or cut the string for him as he tied up our roast. The process took about 20 minutes from start to finish and as he worked other customers came in and waited patiently till he completed our order. We chatted with the other customers about how we planned to cook the roast, and everyone was cordial and no one seemed to mind that they had to wait to be served. There is a large chain supermarket about 2oo yards up the road, and it would have been faster (and probably cheaper) for someone to go there and grab a plastic wrapped, pre-cut steak or pork chop from the unattended meat counter. And yet people came and waited, appreciating Piero's quality of product and skill with knife, saw and twine..... as it should be!

Friday, August 22, 2008

Spalla di Maiale Affumicata - Pulled Pork Italian Style


Slow cooked pork is a grand tradition around the world. Whether you're talking Carolina Pulled Pork, Hawaiian Kalua Pig, Cuban Lechon Asado or Italian Porchetta, it all comes down to a delightfully fatty piece of meat, seasoned well and slow cooked to perfection. I've been making Carolina style pulled pork in my smoker for several years now, but recently I decided to switch up my seasoning a little and came up with this Italian-American fusion which my friends and family rave about. It takes a long time to make, but the actual steps are quite easy. This dish is great reheated, so don't be afraid to cook it a day or two in advance. The basic process is as follows:


Step 1 - Brine meat overnight (brining seasons the inside of the meat and ensures that it will remain moist)

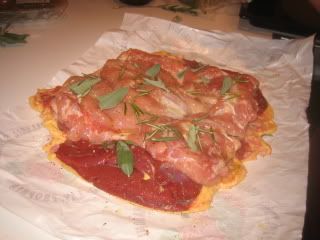
Step 2 - Rub with a spice blend

Step 3 - Slow cook until the meat reaches an internal temp of 195 degrees (I know this sounds high, but you need to reach that point for this tough but flavorful piece of meat to become tender enough to pull apart)

Step 4 - Rest until cool enough to handle and pull the meat apart into bite size pieces

Step 5 - Season to taste with salt, pepper and bbq sauce (some people like their pulled pork with a lot of sauce, but I prefer mine lightly dressed like a salad. You can serve extra sauce on the side for people who want it.)


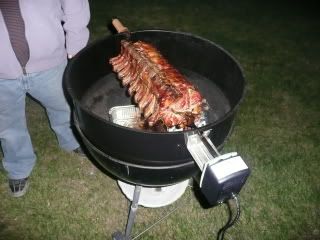
Don't worry if you don't have a big meat smoker like mine, because you could make this same recipe in a regular oven (although it won't have the subtle smokey goodness that comes from the wood oven technique).


Ingredients:


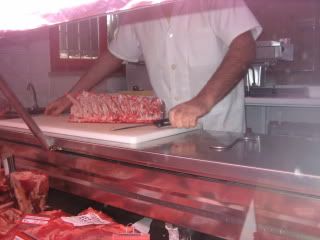
1 (or in my case 6) bone in pork shoulder, a.k.a. Boston Butt

Kosher Salt

Brown Sugar

Black Pepper

Garlic Powder

Onion Powder

6 lemons

1 cup chicken stock

4 cloves garlic

3 tablespoons fresh rosemary leaves

1 tablespoon dried fennel seeds

red pepper flakes to taste (optional)


The day before you plan to cook the pork, prepare a brine of 1/2 cup kosher salt, 1/2 cup brown sugar and 1 gallon of cold water. Mix well until the salt and sugar dissolves. Place the shoulder(s) in a large zip-top storage bag, pour the brine over the top, seal the bag and place the bag in a large bowl or roasting pan and refrigerate overnight.


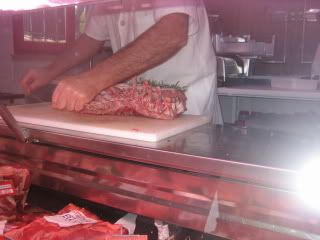
VERY EARLY THE NEXT MORNING, remove the meat from the brine, dry with paper towels and rub with a blend of equal parts garlic powder, onion powder and black pepper. Preheat the smoker (or oven) to 250-275 degrees and place the meat inside.


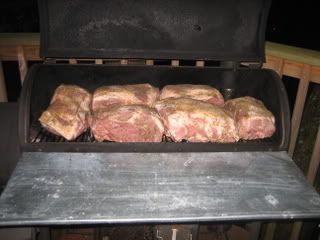
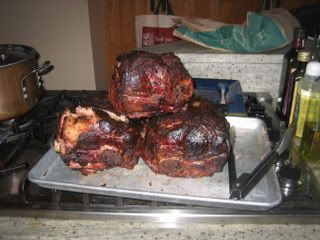
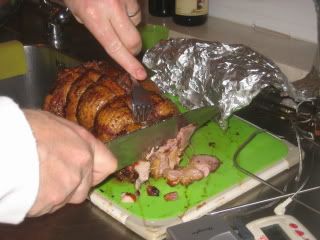
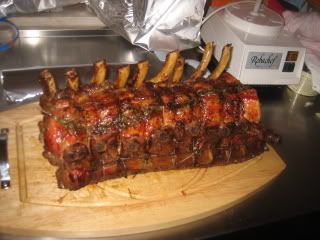
If using a smoker, place it on the rack with a large drip pan underneath. Remember this is a fatty piece of meat and slow cooking will render out alot of the grease. If cooking in the oven, place the meat on a rack in a large roasting pan. Depending on the temperature of your smoker/oven and the size and shape of the piece of meat, it will take between 8 and 12 hours to cook. The only way to know when it's done is with a meat thermometer. Remember that you are looking for in internal temp of 195 degrees. I usually start checking the temp after 6 hours. Don't check it constantly, because everytime you open the door to the smoker or oven, you are losing heat and increasing the cooking time. Once the meat is done cooking, remove it from the smoker/oven and rest it wrapped in foil for about 30-45 minutes. While it is cooling, prepare the sauce.


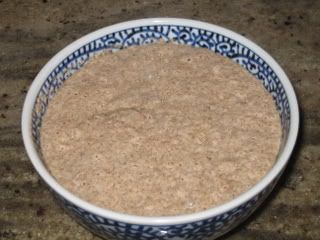
Juice all of the lemons, reserving three or four strips of the peel (zest only). Place the lemon juice, lemon peel, chicken stock, garlic, rosemary, fennel and a pinch of red pepper flakes in a blender and puree. Taste and adjust seasoning to your liking. Add salt and pepper as necessary. It should be citrusy, with a pronounced fennel/rosemary flavor.


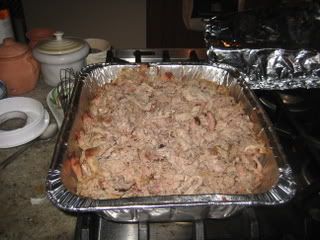
When the meat is cool enough to handle, start pulling the meat apart, disposing of any connective tissue or large chunks of fat. I wear disposable food service gloves for sanitatary reasons and also to keep the greasy meat from building up under my fingernails.


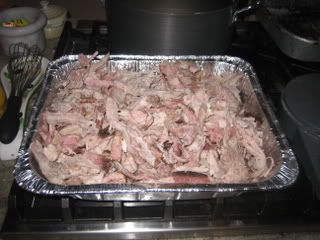
Once the meat is separated into relatively uniform, bite size pieces, begin seasoning it. Taste a little first, then add some of the sauce followed by a sprinkling of salt and pepper if necessary. Mix the meat with your hands as if you were tossing a salad, then taste again. Continue adding the sauce and adjusting the seasoning until you are satisfied with the taste. Once it is seasoned, place it back in the smoker/oven to reheat for 30 to 45 minutes. If you are making it a day or two ahead, you can simply refrigerate it after seasoning it and then reheat in a 300 degree oven for 45 minutes on the day you are serving it.
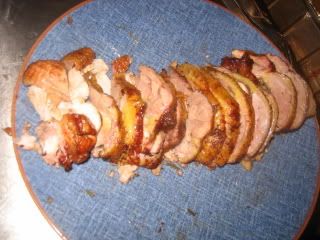
Serve it as a main dish with your favorite contorni, or pile it onto a lightly toasted ciabatta role for the best pulled pork sandwhich ever!

Friday, July 25, 2008

Attempting to be Artisanal


Due to overwhelming demand from my fanbase (my brothers Jeff and Tom), I'll detour from talk of Italy and BBQ to discuss bread baking. Pizza, fried dough and good quality Italian bread have always been a staple in our family. I've been toying with a recipe from the King Arthur Whole Grain Baking book and adapted it into a great, basic multi-grain dough that can be used for pizza, ciabata and just about any Italian savory bread dish. The recipe and technique is as follows:


Starter
1 cup whole wheat flour
¾ cup cool water
¼ tsp dry yeast
Mix, cover and leave over night


Place starter in stand mixer bowl with dough hook and the following:
1 cup whole wheat flour
2 cups bread flour
½ cup multi-grain hot cereal (unflavored, unsweetened variety sold next to oatmeal)
¼ cup olive oil
2 teaspoons sea salt
1 teaspoon dry yeast
1 ¼ cup cool water


Start mixing on low, scraping down sides of bowl occasionally until all dry ingredients are incorporated.


The dough should be wetter than you think. The consistency should be between taffy and cake batter. If it seems dry, add more water.


Beat on low for 10 minutes, and then turn out into an oiled bowl. Cover with a cloth and let rise for one hour.


Gently lift the dough out of bowl, starting from the center and letting it drop gently, allowing the loose dough to stretch from your hands into the bowl (almost like pulling taffy).


Borrowed without permission from the King Arthur Whole Grain Baking Book because I couldn't figure out how to take a picture while I had both hands covered in dough and olive oil. (Publishers please forgive me.)

Repeat once per hour for a total of three times. This develops a very elastic dough with long chains of gluten that will hold big air bubbles. After the third turn, preheat your oven to 500 degrees and form the dough into loaves as follows:


For a normal Italian (Ciabatta style) loaf, I start with 500 grams of dough (about one third of the total recipe)


First form it into a rectangle, as if you were making a pizza


Next, roll that up "jelly role" style


Pinch the edges well to seal up the loaf


I use a French Baguette pan to rise my loaves


Hint, line the pan with Reynolds Wrap Release foil which has an amazing non-stick coating


Once the loaves have risen (about an hour), you can bake them in the baguette pan, but they will end up with a round bottom. Instead, I like to slide them (foil and all) out of the pan and onto a hot pizza stone.


After 10 minutes, drop the oven temp to 400 degrees and pull the foil from under the loaf


Continue baking directly on the stone for 10 more minutes, rotate the loaf 180 degrees and cook for 5 more minutes.


Cool on a wire rack and enjoy!

Nutritional analysis:
Serving size: 42g (about 2 slices) Calories 84 Fat 2gm Fiber 2gm Carb 14 gm


For pizza, keep the dough refrigerated, then when you are ready to cook it, pinch off a tennis ball sized piece and form the crust as you like it.


I like to place a baking stone in my barbecue grill and preheat it on high for 1 hour. This helps create a super crispy crust.